Buca n°1 |
Buca n°2 |
Buca n°3 |
Buca n°4 |
Buca n°5
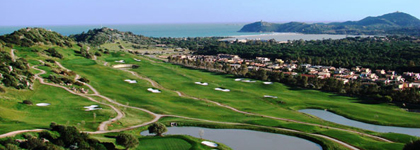
Tanka Golf Club buca n°1
Par 4
| tee bianco | tee giallo | tee nero | tee rosso |
| 000 mt | 000 mt | 000 mt | 000 mt |
| 000 yd | 000 yd | 000 yd | 000 yd |
In questo semplice par 4 col primo colpo bisogna tenersi leggermente sulla destra per non cadere nei bunkers posti sul lato sinistro della buca.
Con un secondo colpo si arriva su un green privo di particolari insidie.
Tanka Golf Club buca n°2
Par 4
| tee bianco | tee giallo | tee nero | tee rosso |
| 000 mt | 000 mt | 000 mt | 000 mt |
| 000 yd | 000 yd | 000 yd | 000 yd |
Questo par 4 è un leggero dog-leg a sinistra. Si raccomanda di giocare il drive sulla destra per attaccare il green in salita.
Il green sopraelevato è ben difeso da quattro strategici bunker.
Tanka Golf Club buca n°3
Par 3 |
Colpi 1
| tee bianco | tee giallo | tee nero | tee rosso |
| 000 mt | 000 mt | 000 mt | 000 mt |
| 000 yd | 000 yd | 000 yd | 000 yd |
In questo par 3 molto importante è il colpo al green e richiede grande precisione. Il green è difeso da un ampio bunker sul lato
sinistro, uno a destra e subito dietro uno pronto a punire i tiri lunghi.
Tanka Golf Club buca n°4
Par 5
| tee bianco | tee giallo | tee nero | tee rosso |
| 000 mt | 000 mt | 000 mt | 000 mt |
| 000 yd | 000 yd | 000 yd | 000 yd |
Il primo par 5 è un leggero dog leg a sinistra nella parte finale. Bisogna prestare attenzione a sinistra agli eucalyptus ed al grosso bunker sul
lato destro. Per i più audaci si può provare a raggiungere il green con il secondo colpo.
Tanka Golf Club buca n°5
Par 3
| tee bianco | tee giallo | tee nero | tee rosso |
| 000 mt | 000 mt | 000 mt | 000 mt |
| 000 yd | 000 yd | 000 yd | 000 yd |
Il tee shot di questo par 3 si effettua a bordo di un lago. I metri che ci dividono dal green non sono molti, ma il green a più livelli è
ben protetto da grossi bunker.